

I’ve found an invigorating way to transform my dull hair without leaving the house: I dye it myself! Though some might prefer the professional touch of a salon, I find that option to be prohibitively expensive. Thankfully, I’ve discovered a thriving market of Japanese hair color brands designed for the DIY enthusiast. Among them, Blaune by Kao stands out as my Holy Grail (HG) product.
I’ve experimented with a multitude of other options, but nothing compares to the simplicity and effectiveness of this particular kit. It encapsulates everything I love in a product, making my life not just more colorful but also less complicated. The ease with which I can use it reflects my philosophy of finding joy and beauty in simplicity. Whether you’re a novice or a seasoned home hair colorist, Blaune by Kao is worth a try if you share my love for things that don’t overcomplicate life.
What’s in the Kit
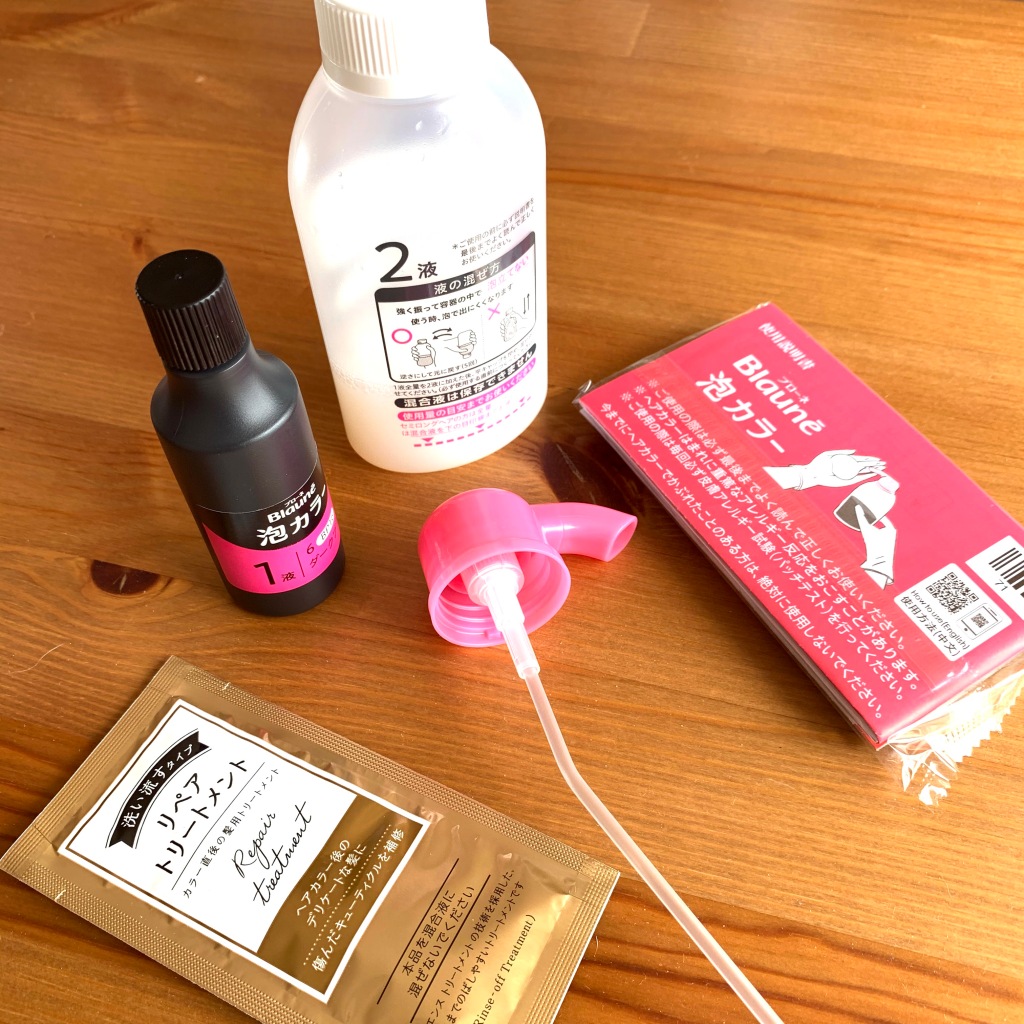
Included in the Blaune by Kao kit are two distinct solutions, a foamer cap designed for easy application, a pair of gloves to protect your hands, and a sachet of rinse-off treatment to complete the process. For those with mid-length hair like mine, a single box provides ample product. However, if you have hair that is both longer and thicker, you might find that two boxes are necessary.
Although the instructions are written solely in Japanese, they are accompanied by clear and understandable illustrations that transcend the language barrier. This makes the process accessible to a wider audience, whether or not you understand Japanese. Here’s a brief guide, translated into my own words, to provide insight into the steps involved.
How to Use Kao Blaune Bubble Hair Color
- Begin by pouring Solution 1, contained in the black bottle, into Solution 2, which is housed in the white bottle. Once combined, seal the white bottle with its regular cap. This is a crucial step, so ensure it’s secured properly. Then, with care and attention, gently tilt the bottle back and forth about five times. This action helps mix the solutions, but remember not to shake it, as this can affect the consistency.
After this gentle tilting, remove the regular cap from the white bottle and replace it with the foamer cap, which is easily identifiable by its pink color. This step transitions the mixture into a foam, making it ready for application. It’s a clever design feature that adds to the ease of use, reaffirming why this product is a standout choice for home coloring. - Before beginning the application, make sure to wear the gloves provided in the kit to protect your hands from any staining or irritation. Then, holding the bottle upright, dispense the foaming solution by gently pressing the center. You’ll notice the perfectly aerated foam emerging, ready for use.
Start by applying the foam to the roots of your hair, ensuring that the mixture penetrates deep where the coloring needs to be most intense. From there, methodically work the foam through the full length of your strands, using your gloved fingers to evenly distribute the solution.
Once fully applied, gather your hair into a loose bun at the top of your head. There’s no need to cover it with a cap or wrap; simply leave the foam to work its magic for 20 minutes. The well-designed formula doesn’t require any additional cover, allowing you a fuss-free experience that makes home coloring both accessible and efficient. - Once the 20 minutes have elapsed, it’s time to rinse out the foam. Using warm water, thoroughly wash your hair until all traces of the colorant are removed. Then, proceed to lather your hair with your regular shampoo, cleansing as you usually would, and rinse once more.
Next, open the sachet containing the attached repair treatment. Apply this specialized formula generously to your hair, ensuring that it covers all areas. This treatment is designed to nourish and restore the health of your hair after the coloring process. Let it sit and penetrate your strands for about 3 minutes, allowing the rejuvenating ingredients to work their magic.
Finally, rinse your hair well, making sure that all residues of the repair treatment are washed away. Your newly dyed hair should now feel soft, vibrant, and revitalized, reflecting the salon-quality experience that the Blaune by Kao kit promises right in the comfort of your home.
Skin Allergy Test
For convenience and ease of clean-up, it’s optimal to carry out this hair coloring process when you plan to take a shower. This way, the rinsing steps can be seamlessly integrated into your regular shower routine, making the entire experience more streamlined.
However, before you embark on this transformation, it’s paramount to conduct a skin allergy test or patch test at least 48 hours before application. This simple but crucial step helps ensure that the product is compatible with your skin. Here’s how you can do it:
- Prepare the Solution: Follow the mixing instructions as outlined in Step 1 above.
- Apply a Small Amount: Using a cotton swab, take a small quantity of the freshly mixed solution.
- Choose the Test Site: Dab the solution onto the back part of your arm, an area that’s usually sensitive enough to detect a reaction but not highly visible.
- Monitor for Reactions: Over the next 48 hours, keep an eye on the area for any signs of irritation, redness, swelling, or other abnormalities.
Should you experience any of these symptoms, it’s an indication that the product may not be suitable for your skin, and you should not proceed with the application. Always prioritize your health and safety, recognizing that individual reactions to hair color products can vary.
Why I love this product
Allergic Reactions:
From the beginning, I’ve been fortunate not to experience any allergic reactions to the Blaune by Kao kit. It’s reassuring and I hope this pleasant experience continues.
Scent and Texture:
What I appreciate is the gentle, non-harsh scent of the product. It’s not suffocating but rather quite pleasant, especially in the included repair treatment. The foam itself is smooth and luxurious, transforming into a creamy texture as you rub it into your hair. This transformation ensures that the product clings and penetrates properly during the coloring process.
Effects on Hair and Scalp:
The result is hair that is shiny and smooth for weeks without any drying effect. Since the application only requires tapping the foam into the hair, it doesn’t stress the scalp or exert undue pressure. This is in stark contrast to other brands that require brushes or combs for application, which I find harsh, especially when the coloring product makes the hair stiff. This gentle foam application avoids potential damage to both hair and scalp.
Convenience and Versatility:
I love how the product doesn’t drip, allowing me to multitask, like checking my blog while waiting for the timer to go off. The foam spreads effortlessly, ensuring complete coverage even in those typically hard-to-reach areas like the back of the head and inner layers of hair. The color stays vibrant for about 3 months and contains hair-protecting ingredients like hydrolyzed silk solution and soft lanolate.
Gentleness and Ease of Application:
Proof of its gentleness is in the fact that my hands don’t peel or look pruney after rinsing the foam. The application is incredibly simple and efficient, giving my hair a fresh, revitalized look in just about 30 minutes without leaving any color residue on my towel.
Variety of Shades:
Finally, Kao Blaune Bubble Hair Color kit offers an impressive variety of shades to choose from, allowing you to find the perfect match for your personality and style.
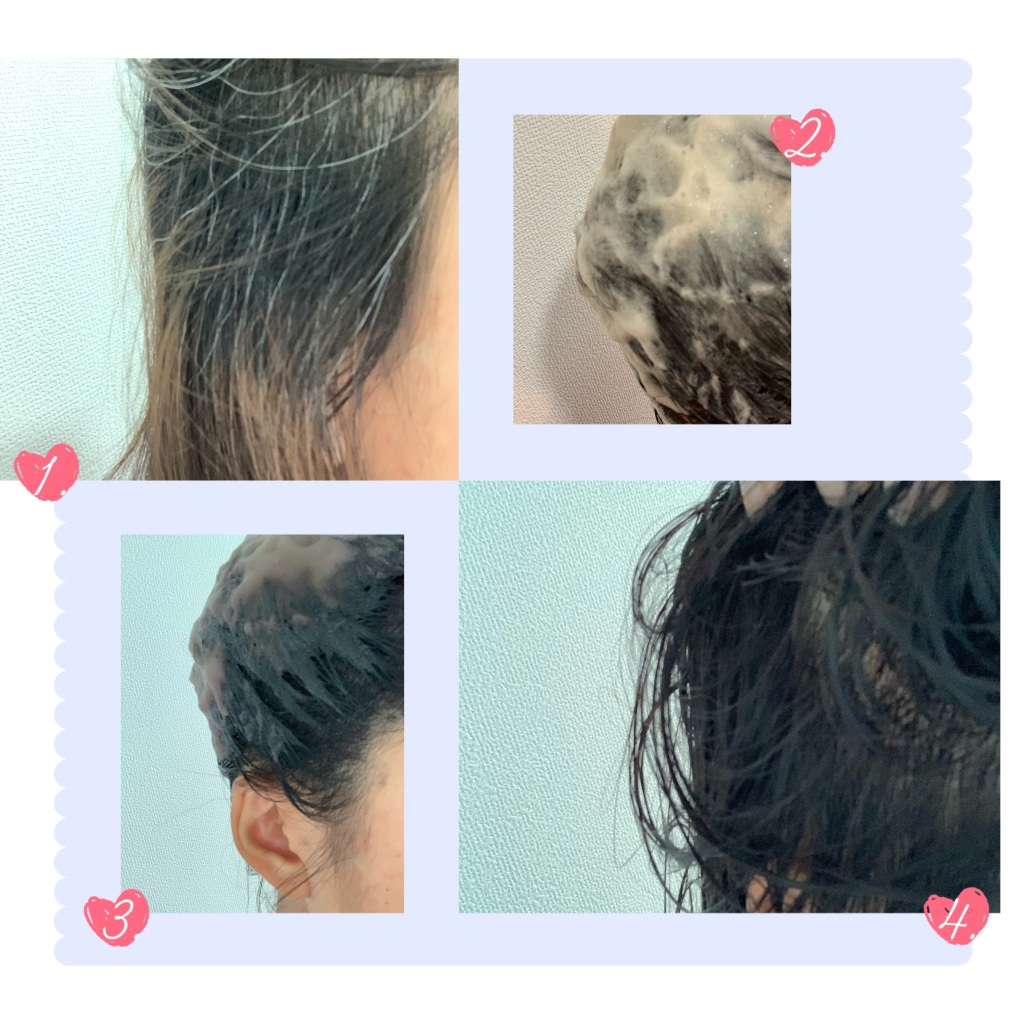
Before and After
At 29 years old, I find myself encountering scattered gray hairs now and then. It’s a natural change but one I prefer to address with coloring. Just a few hours ago, I completed my regular hair dyeing ritual using the Blaune by Kao kit and I’m thrilled with the transformation. To illustrate the pleasing difference, I’ve created a collage that I’ve included right before writing this article.
This time, I chose color 6, a rich dark brown shade that’s specifically recommended for gray coverage. The result is a natural, deep hue that effortlessly blends away the grays, leaving my hair looking vibrant and youthful. What stands out with this product is not just its efficacy but also the value for money it offers. This balance of quality and affordability makes it an exceptional choice for anyone looking to enhance their hair color from the comfort of home.
What do you think about this product? I’d love to hear your thoughts!
Don’t miss my next review. Not a WordPress user? Subscribe via email.

how do I buy this product
LikeLiked by 1 person
Hello. If you’re in Japan, it’s available at the supermarkets and drugstores.
LikeLike
Awesome content!!
LikeLike
Thank you!
LikeLike
Very helpful guidance!!! I feel like if my best friend wasn’t also my hairdresser, I could definitely follow your directions happily, and with peace of mind!! Thank you!!
LikeLike
Lucky you! Glad to be of help. Thank you for dropping by!
LikeLike